Showing posts with label baby. Show all posts

Wednesday, June 2, 2010

Baby K Turns 1

For Baby K's 1st birthday
I decided to have a kite party .
It was at the end of March, so I figured it would be the perfect weather for kite flying.

The plan was to have it outside under the canopy tent, with picnic blankets all over the lawn. But you know what they say about best laid plans... we moved inside.


There was a large bucket filled with kites for everyone.


Everyone did get to go out for a bit to fly kites.
Sorry for the poor pictures. I was running late and didn't have much time to take pictures.

We had barbeque beef sandwiches, salads, and chips followed by cupcakes. Even though it didn't go exactly as I had planned, it was still a very fun party.

Sunday, November 1, 2009

Hickory Dickory Dock

This little mouse did not go up the clock, but he was the most adorable little trick-or-treater ever.


I made this costume for my six year old's 1st Halloween. Then when my daughter was 1 I moved the cheese bow up by her ear, and she was the sweetest little girl mouse. Now it has come out again for Baby K's first Halloween. That's not to mention all the times it has been loaned out to friends.

I know there are some great store-bought costumes out there, but this thing has held up incredibly well over the years. Quality - that's what I love most about homemade.

Friday, August 21, 2009

Semi-Homemade


A REALLY long time ago I posted about how I was wondering if I should make Baby K's blessing outfit, or if I should use one of the ones I made for my other boys. Later I told you that I had "sort of" made him his own outfit, but that I was waiting to get the pictures back before I wrote my post. I know you thought the day would never come, but I just got the pictures back about 2 days ago, so here is the long-awaited post.


I decided to call his outfit "Semi-Homemade"


Shirt - Store bought

Tie - Homemade

Socks - Store bought

Booties - Homemade

Shorts - Store bought

Blanket - Homemade

There you have it - "Semi-Homemade."

{Thanks to my wonderful friend for the great pictures. She took some REALLY fantastic pictures. Visit her blog here.}

Saturday, August 1, 2009

"Ties for Little Guys"

If you have been to my Etsy shop recently, you will have noticed that it is empty. With the move, the kids home for summer, and all our summer visitors there has been no time to keep up with my shop. So I finally decided that the shop would have to be on hold until school starts again. But I am getting things ready. This is something new I will be adding to my shop. My "Ties for Little Guys" (thanks to my SIL for the cute name) will be in the shop this September (or late August if I am really ambitious).

Friday, July 31, 2009

Refinished Crib

So here was the before for the crib. I just knew it had potential!


And here is the after.


Wash. Sand. Prime. Paint. And voila, a beautiful new crib!
Himalayan Poppy... the color even sounds pretty.
Update: I am linking this post up to Furniture Feature Friday on Miss Mustard Seed's Creative Blog. Check it out!


Furniture Feature Fridays

Monday, May 11, 2009

Decisions, Decisions

We will be blessing Baby K in a couple of weeks, so I am naturally thinking about what he should wear. I've had something different and handmade for each of my other kids.


I made this outfit and blanket for my first son to be blessed in.


I made this for my second son.


This beauty was made for my beautiful little princess, but not by me. It was made by someone much more talented than me.


Look at the amazing detail on this thing. Isn't it gorgeous?!


I pulled them all out the other day and it got me thinking, "Am I wasting my time making another blessing outfit for Baby K? I have two perfectly fine outfits to choose from right here. They've only been worn once. The next one I make will just be worn once and then packed away like the others."


Then my other side says, "All the other kids have their own special outfit, he deserves his own. And I have been wanting to put them out on display somehow. If I don't make another one, I won't be able to do that." So I am torn. I'm definitely leaning towards making another outfit, but I'm just not sure.

So here are my questions for you:


1. Should I make him his own outfit or just use one of the others?


2. Do you have any good or unique ideas for displaying the blessing clothes?


Please comment. I need some good advice.

Monday, April 27, 2009

A Beanie for Baby Revised

Remember this post with the creepy picture? Well, here is a replacement picture. Much cuter, don't you think?


And just in case you were wondering what is under that hat...


Lots and lots of hair.

Monday, March 30, 2009

Down to the Wire

The final project I wanted to get done before Baby "K" makes his appearance was completed this morning. Whew! That was a close one considering he will be arriving by c-section tomorrow morning at 8:00. So, here is the last project I had planned for the Amy Butler fabric...


I LOVE how this turned out. It is so roomy and so stylish. I found the tutorial at A Mingled Yarn. And she did a fabulous job on the tut. Very clear directions.


There are 10 pockets in this thing! Can you believe that?! There is a large zipper pocket on the back, 1 on each side, and 2 in the front.


Then there are 5 more on the inside.


There is plenty of room to keep all this stuff that I made to coordinate with it, and it isn't even starting to fill up. But somehow it isn't big and bulky like a lot of diaperbags.

(nursing cover, changing pad, diaper and wipes pouch, and baby sling)


Of course, I can never leave a pattern "as-is." I always have to make some alteration. This time I kept it to a minimum. Rather than using the vinyl lining, I thought I would use a regular cotton lining and then cover it with clear plastic vinyl, the same way you use a stabilizer. I attached the vinyl to each lining piece before sewing it. Not too big of a change, right? I DON'T recommend doing this! It turned out great, just the way I pictured it, but it was a pain the the butt to work with. It took me WAY longer to make than it should have. Will I learn my leasson and just follow the patter next time I make something? ... Probably not.


I am so excited to use my new bag. The great thing about this messenger-style diaperbag is that it doesn't just have to be just a diaperbag. It could be used by anyone for anything. So versatile... so attractive.


I've made a lot of stuff for myself recently, but I figure I've worked hard to get this little guy here. I deserve it!

Tuesday, March 24, 2009

Baby "K"

This is a little something I put together for my baby.


The tutorial for the little booties is at Stardust Shoes. I can't wait to see him in it. Actually, I can't wait to see him period.

Friday, March 20, 2009

Old Things are New Again

Just a little something to keep baby covered up and a little padding for the handle.


A adore this fabric, and it conveniently matchs perfectly with the carseat/carrier I have.

Wednesday, March 18, 2009

Baby Girl Gifts

My oldest boy's teacher is having a baby girl this month. I wanted to send something quick and easy, but still cute. I think I achieved it with this...


An appliqued onsie and a crinkly square in an adorable purple flower fabric.

I do plan on eventually getting some of these in my shop, but there are a few projects I want to get done before my baby makes his appearance. Once I get those finished, then I will concentrate on adding to my shop.

Monday, March 16, 2009

Stuff for the Mommy

So lately I've been doing A LOT of sewing, but very little blogging (none). I will not bombard you with a ton of projects all at once, but I will post them all over the next several days.

First up are some more projects I've been making with the Amy Butler fabric I picked up.


There is a nursing cover, a changing pad, and a diaper and wipes pouch. I just love the idea of having all these coordinating items.

There are 2 more projects coming that are made with this same fabric, but they aren't finished yet, so you will be seeing a few other projects first.

Thursday, March 5, 2009

Reversible Pouch Sling Tutorial

So now you get to see my 1st project I'm working on with the fabric I just got. This tutorial came about because I couldn't find a decent one ANYWHERE unless I wanted to pay for it, which I didn't. So here it is... my very first tutorial.


Step 1
The first thing you need to do is figure out how long your fabric needs to be. Take a tape measure and measure across your body from your right shoulder to your left hip. On your shoulder the tape measure should be right where a t-shirt seam would be. On your hip measure to the top of your hip (where your hand would be if you were standing with your hands on your hips). I hope that's clear. Now take that measurement, double it, and add 6 inches (this extra is for baby room, and seam allowance). So if you measured 22 inches from shoulder to hip your total length would be 50 inches. This is how long you fabric needs to be.

Step 2
Now is the fun part... picking your fabrics. Choose 2 coordinating fabrics and cut them so each is 21 inches wide and the length that you calculated in the first step. (This will make your final sling 20 inches wide. You can go slightly wider if you would like, but DO NOT go any wider than 24 inches when complete. It is unsafe for the baby at that point.)

Step 3
Now, position your fabrics right sides together and fold in half width-wise.

Make sure all layers of the fabric are laying smooth. Now, fold in half again, this time length-wise. Again make sure all the layers are smooth. You are going to be making another cut, so you really want all your fabric to be smooth and crease-free. (It has been brought to my attention that this photo makes it look like the material is narrower on one side. Sorry, that is just the angle of the picture. Your fabric should be a perfect rectangle at this point.)

Step 4
Using a pencil mark a curved line (like a half smile) along the side where all the loose ends of the fabric are. Notice that the curve straightens out close to the edge.

Now, cut along that line through all the layers of fabric.


Step 5
Unfold the fabric, but leave the two pieces right sides together.

Stitch each long side together. Trim edges to 1/4 inch if necessary.

Turn right-side-out and press seams.


Step 6
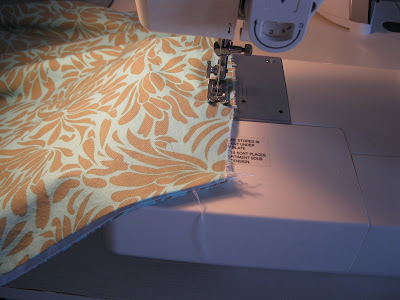
Put the open, curved sides together and stitch through all layers.

Trim edge to 1/4 inch if necessary.

Turn so the other fabric is on the outside and stitch the curved side again. This makes a french seam. All rough edges should now be enclosed.

Take the flap that the french seam made, and lay it flat. Stitch it in place.


Step 7
This step is completely optional, I just like the way it looks. Stitch all the way around each side of the upper edge and lower edge of the sling.

Fold in half length-wise and your sling is finished.
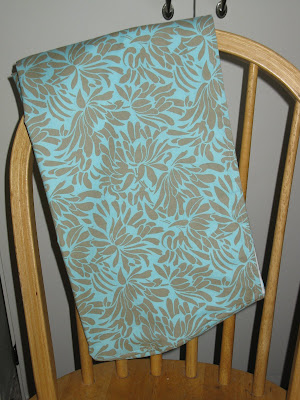

I hope this tutorial was clear. If you find any problems with it, or something doesn't make sense, please let me know so I can correct it or clarify myself. If you make a sling, let me know. I'd love to see the finished product.